Sunday, August 11, 2013

Thecha (Green chili thecha)

A chutney made with chillies and garlic, usually served with traditional western maharashtrian bread (Bhakri)


Theres basically two kinds of thechas. One thats made with green chillies and another made with red chillies. I looovvee both. They just add the extra zing to a meal. At any given time, you will find this in my fridge!

If you want to make the perfect thecha, its very important to use a mortar and pestle and do some hard work! If you are too lazy, you can use the food processor/ grinder, but let me warn you, its not going to be anywhere close to this one! If you have a stone mortar and pestle, nothing like it. I had access to a marble one, good enough.

You will need:

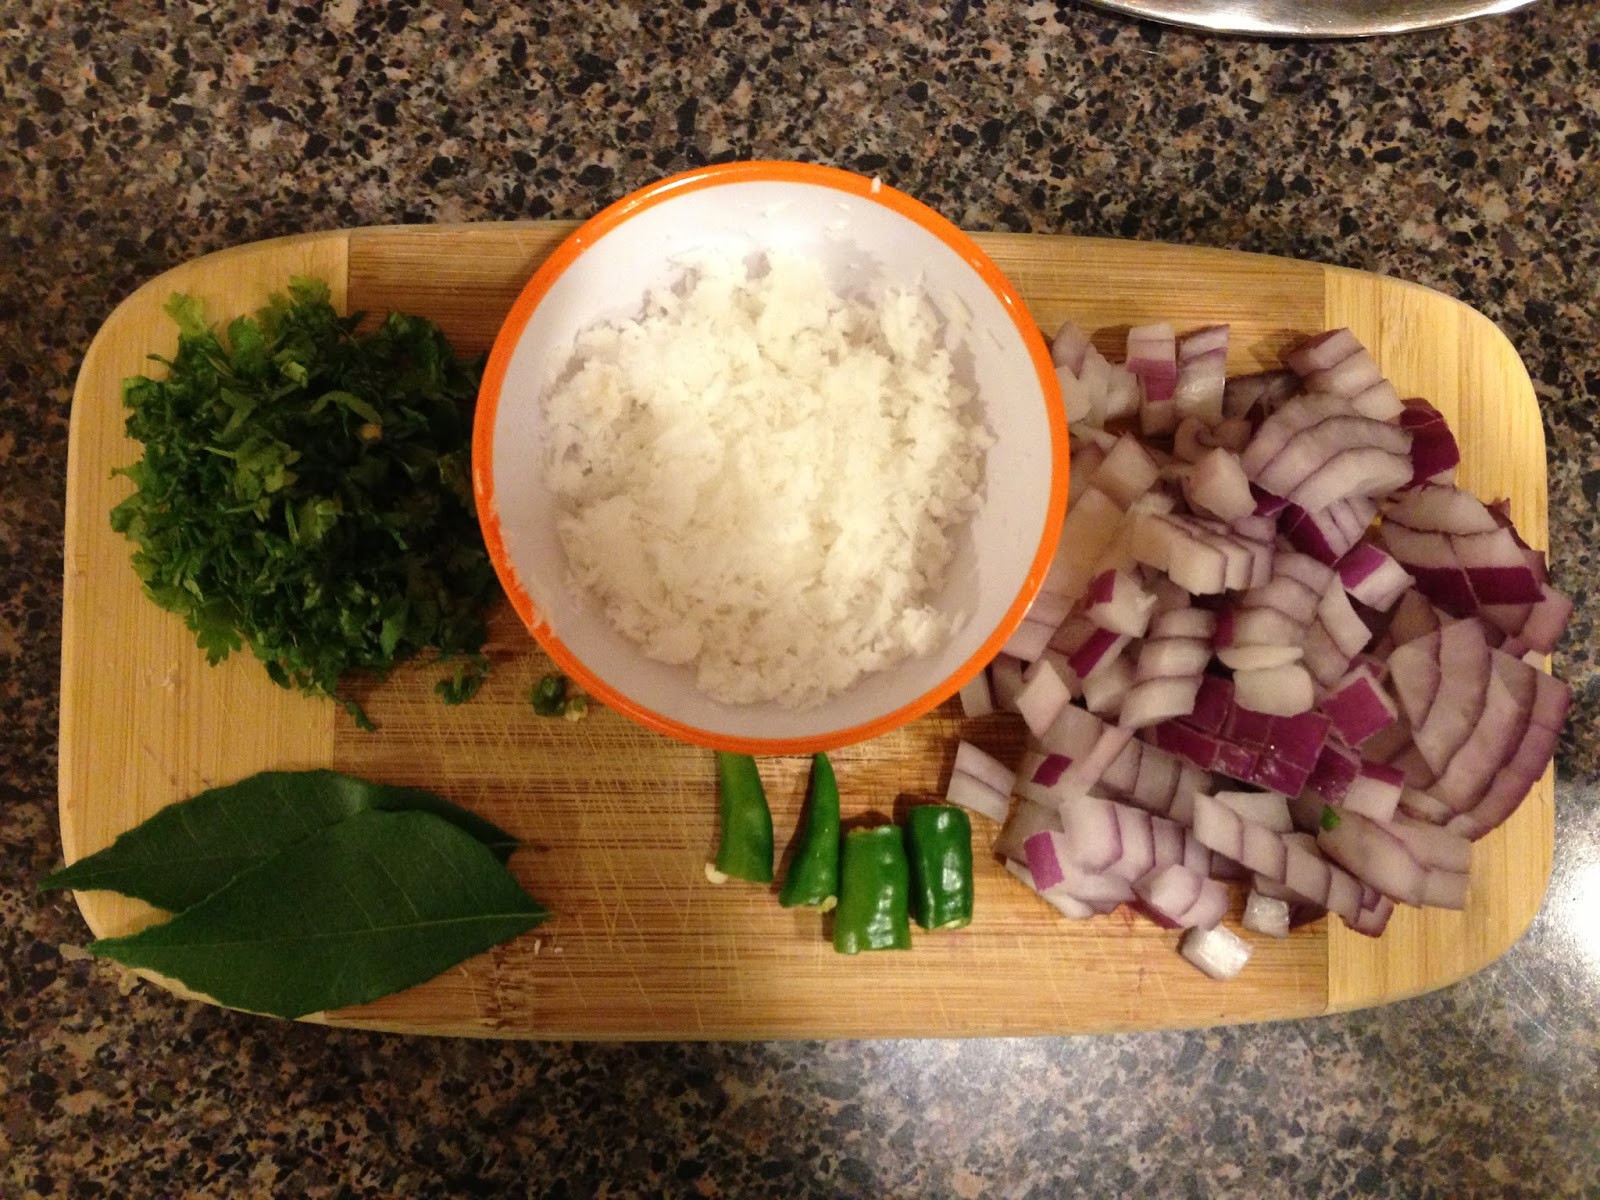
15-20 green chillies, chopped
7-8 cloves of garlic, chopped
a bunch of cilantro 
-- the proportion is key here!
sea salt (the coarse texture helps in grinding and tastes better, if not available, normal salt will work fine)
half a tbsp of oil


1. Take all the chopped ingredients in the mortar, little at a time, but in proportion
2. start grinding, as you grind the volume will reduce and you can add in more ingredients `
3. After all of the ingredients are in the grinder, grind till you get a homogenous chutney (as shown in the picture)
4. Heat oil in a small pan til warm
5. add the ground thecha, to the warm oil, stir well and let heat for just 1/2 a minute and turn off the heat (you dont want to cook the thecha. This procedure is to just reduce the pungency of the garlic)


The thecha is ready! serve it with bhakri. Bhakri is thick and bland, so its a perfect vehicle for something as spicy and flavorful as this!

Upma

A savory breakfast snack made with semolina


Just like Poha/Pohe Upma, is one of the most common breakfast dishes in India. No two upmas will ever taste the same and restaurant upmas are consistent but are soaked in fat. The point is, it is hard to get hold of the perfect upma! People will add unnecessary ingredients, too much mustard, burnt cumin and white lentils, burnt semolina, unroasted semolina (yuck!) and the worst blunder of all, making too dry or too gooey an upma.. hah! The list is endless as to how many ways the upma can go wrong :P

But now you got 'the' recipe :) One very VERY snobbish person has testified that I make the best upma in the world ;) This will make the perfect, moist, tasty upma!

You will need:

3/4 cup fine-medium rasa (semolina/ sooji)
1 tsp ghee
1 tbsp oil
mustard seeds
1/2 tsp asafetida
2-3 curry leaves
1 red chilli cut into pieces
2 green chillies chopped
1 onion chopped (medium sized square)
1/2 tomato, chopped
2 1/2 cups water
salt
sugar (optional)
lemon juice
cilantro


1. Heat the ghee in a pan, add the semolina and roast (stir continuously), till slightly golden.
2. Turn off heat, transfer on a cold plate and spread into a layer to cool down
3. In the same pan heat oil
4. Simultaneously in another pan, start boiling the water
5. Add mustard seeds followed by asafetida, curry leaves, chillies, white lentils to the hot oil
6. add the onions to the oil mixture and cook covered for 2-3 minutes
7. Remove lid, stir and add the tomatoes, cook for just about a minute.


8. The water should be boiling by now, add the boiling water to the fried onions
9. add salt and sugar (optional) as per taste
10. Once the mixture comes to a rolling boil, slowly add the cooled semolina, while stirring constantly
11. The mixture will start to thicken as the semolina hydrates. Mix thoroughly making sure no lumps form.
12. Lower the flame, cover and let cook for some time.
13. Remove lid and stir, till a soft, moist upma is obtained. If overcooked, it becomes dry and might burn and stick to the pan. If undercooked, it will be sticky and even uncooked.
14. Garnish with chopped cilantro and serve hot


This dish is sometimes served garnished with sev (fried lentil noodles)


Aamti

A tangy sweet and spicy preparation of dal (pigeon peas)


If I were to name one top 'soul food' of mine, it will probably be aamti-bhat (aamti with rice). I remember, when I came back from a month long study tour of Europe after 10th grade, Aji asked me what I wanted to eat and aamti-bhat was my instant reply.

Aji made the best aamti and it is probably the first dish that I managed to make exactly like hers! Which was a big accomplishment, considering the fact that my family can thrive on just aamti for, well forever!

Now theres a 100 different kinds of aamtis. This one is the basic or kandyachi (onion) aamti. YOu can omit the onions and it will be a basic aamti recipe.

You will need:
1 cup cooked dal (in a pressure cooker)
1 tbsp oil
musard seeds
a pinch of asafetida
1/2 tsp turmeric
2-3 curry leaves
1 green chili chopped
chopped cilantro
1 tablespoon fresh grated coconut
1 tsp kala masala (maharashtrian goda masala)
1/2 tsp red chili powder
2 tsps tamarind chutney (if you dont have tamarind chutney, use a little tamarind concentrate and a big chunk of jaggery)
water
salt
cilantro and grated coconut for garnish


1. Heat the oil in a kadhai
2. add mstard seeds, turmeric, asafetida, curry leaves, chillies and onion.
3. add the cilantro and coconut to the hot oil, give it a stir and cook covered till onion is cooked
4. Remove lid and add the masala and fry for a bit


5. Add salt, tamarind chutney and red chili powder to the dal and mix well)
6. Add the dam mixture to the fried onions
7. Add lots of water, to make aamti of desired consistency (some people prefer it really thin and watery, I like it thicker)
8. Bring to a boil and garnish with cilantro and coconut


Best served hot over rice wth ghee :)


Pithla

Is a spicy sauce made with chickpea flour, onions and spices. Typically eaten with bhakri or rice


Theres many ways of making this. However theres two that are most popular and my favorite! One is spicy, has more complex flavors, is thicker and eaten with bhakri also called jhunka. The other kind is milder, has a simpler flavor, is thinner in consistency and usually eaten with rice.

The basic ingredients for both are same, however the technique is a bit different.

Type 1: Jhunka

you will need:

oil 1 tablespoon (might need more, if you don't add enough oil, the chickpea flour can taste nasty)
mustard seeds
pinch of asafetida
1 small onion chopped
1/2 teaspoon turmeric
2 cloves of garlic, crushed
2 green chillies chopped
3-4 curry leaves
1 teaspoon red masala/ kanda lasoon masala/ chili powder
2 cups water
3 tablespoons chickpea flour (besan)
chopped cilantro

1. heat oil in a kadhai
2. add mustard seeds, asafetida, turmeric, green chillies, curry leaves and crushed garlic
3. add the onion and cook covered till the onion is coked
4. add the red masala and fry for a bit
5.* Mix the chickpea flour into the water until homogenous
6. Pour this mixture into the pan, stir constantly
7. It will start to thicken immidiately.
8. add more water to adjust consistency
9. Cook until 'uncooked' flavor from the flour goes away
10. top with fresh cilantro and serve hot!


Type 2: Pithla

You will need:

oil 1 tablespoon (might need more, if you don't add enough oil, the chickpea flour can taste nasty)
mustard seeds
pinch of asafetida
1 small onion chopped
1/2 teaspoon turmeric
2 green chillies chopped
3-4 curry leaves
2 cups water
2 heaped tablespoons chickpea flour (besan)
chopped cilantro


1. heat oil in a kadhai
2. add mustard seeds, asafetida, turmeric, green chillies and curry leaves.
3. add the onion and cook covered till the onion is half cooked.
4. Add the water into the pan and bring top a boil (the onion will get completely cooked while the water boils)
5. add the chickpea flour one small spoon at a time and stir constantly as you add
6. Break lumps as you stir with the spatula
7. This kind of pithla is a little gritty, but break the lumps as much as possible, because bigger lumps might remain uncooked inside
8. Brink the pithla to a boil and turn off the heat
9. garnish with cilantro and serve hot :)


Bhakri

Western-Indian flat bread (usually made with Jowar (sorghum), Bajra (Pearl millet), Rice, Ragi or a mixture of any of these)


I always try to eat healthy. In my effort to eat wholesome foods, and cutting down on rice, I ended up eating everything whole wheat. The result was exactly opposite of what I expected! I felt bloated, my digestion was more upset than ever before and I could not figure out what was wrong, when I was actually eating 'healthier' almost exclusively home-cooked food! Then I read this article in NY times and I thought wait a second! I may have gluten sensitivity! The next few days went in endless reading and browsing and discussions with people.. and of course I stopped eating gluten and it actually did make a difference and I felt surprisingly lighter :P I got myself tested and I am not gluten sensitive (phew) however, I continue avoiding it, considering the positive effects going gluten-free has had!

Obviously going gluten-free meant not eating my beloved poli (chapati/roti) so I had to find an alternative, and bhakri was the most obvious one! My grandparents ate bhakri everyday all their life, its actually the maharashtrian staple bread. Chapati is more north-indian. My Aji would say that in their times, people would make chapatis only for special occasions. (Maybe genetically I am not efficient in breaking down gluten on a daily basis, because my ancestors weren't used to it!)

So coming back to bhakri! I have been making this and eating it almost everyday for the last couple of months! and here are the few benefits:

1. Once you master the skill, its easier to make than chapati
2. Its more filling
3. Its healthier (variety of grains, no oil)
4. You can make different kinds using a combination of grains
5. And of course its gluten free :)

now the recipe!

You will need:

4 tablespoons jowar flour (you could also try 2 tbsp jowar +2 tbsp ragi flour in summer and 2 tbsp jowar +2 tbsp bajra flour in winter)
1 tablespoon rice flour
3/4 cup boiling water
salt
rice flour for dusting
a glass bowl for mixing
a flat pan/griddle
a bowl of cold water

1. Mix the flours and salt in a glass bowl
2. Bring the water to a rolling boil (very important, if not hot enough, bhakri will crack)


3. Add the boiling water to the flour mixture and mix with a spoon
4. mix well, once a little warm, knead a little with hand
5. divide into four portions and make round balls
6. Heat pan/ skillet
7. dust the rolling board/ any surface heavily with rice flour
8. Place one ball of dough and gently start patting it to make it flat
9. Move the flattened bhakri in a clock-wise motion as you pat it


10. Start from the ends and work towards the centre
11. The ends might look cracked, this is ok!
12. Once the bhakri is uniformly as thin as you can make it (you will be able to make thinner bhakris with practice :P), lift it gently and place it in both ur plams
13. Flip it and place it gently on the hot pan (now the side dusted with the rice flour is facing up)
14. Immediately coat the side facing up with cold water. This will also seal all the cracks. Make sure the entire surface is covered including the edges.
15. When this layer of water starts steaming, flip the bhakri with the help of a spatula
16. Keep checking the bhakri, brown spots will appear on the wet side which is now touching the hot surface.


17. Once this side looks cooked and has golden-brown spots, remove the bhakri and flip it and place it on direct flame (the dry side is on the flame)
18. Move the bhakri over the flame with tongs/spatula till it puffs up completely
19. Remove and serve hot


The perfect bhakri should open up completely and form a pocket and should be so thin that both the layers look translucent, just like the one in the picture :)


Thursday, July 11, 2013

Anda Curry

(Spicy egg curry)

There are so many versions of anda curry that I have tried, but this one is obviously my favorite. For one time, I agree there cant be a 'perfect' anda curry recipe and everyone has their own version, but well if you are trying it for the first time or want to try a different recipe, trust this one that I developed!

You will need: (serves 3-4)

6 eggs, hard boiled and peeled (to get perfectly boiled eggs heat eggs and water let them boil for 11 minutes (count 11 minutes after water starts boiling)) 
2 onions, peeled and halved
1 large tomato, chopped
2 heaped tbsps grated dry coconut
1 tbsp corriander seeds
1 tsp cumin seeds
1 small piece of ginger
3-4 garlic cloves
3-4 dried red chillies soaked in warm water for 15-20 minutes
1 tsp Red masala (malvani masala)
1 tsp red chili powder
1/4 tsp turmeric
2 tbsp oil
hot water
salt


1. lightly brush oil on the onions and roast them on direct flame (as shown in the picture)
2. on a small pan, toast the coriander seeds followed by cumin seeds, and transfer on a dry plate
3. toast grated dry coconut on the same hot pan
4. Once the toasted things cool down, transfer the to the grinder bowl along with the roasted onions, soaked red chillies, ginger, garlic and tomato
5. Grind everything to a fine paste. Add a little water from the soaked chillies, if needed.
6. In a frying pan, take the oil and heat it
7. Add the ground 'masala' to the oil and fry. There has to be enough oil, for the masala to get the right flavor. If 2 tbsp doesnt seem enough, add more. 
8. Once the ground mixture cooks, gives off a nice aroma and leaves oil on the sides, add red chili powder, salt, turmeric and malwani (red) masala


9. Peel and slit the boild eggs as shown in the picture (OR you could cut them in half or quarters, just know that the yolk will dissolve in the curry, if you do so)
10. Once the ground mixture gives off a cooked, fried aroma, add some hot water (hot water just blends better instantly in curries..) and mix well, till you get a smooth homogenous curry.
11. add the eggs and boil till the curry leaves oil on top.
12. Garnish with cilantro and a dash of lime
13. Serve with pav (bread), chapati or bhakri :)


Wednesday, July 10, 2013

Varyache Tandul Danyachi Aamti

(cooked samo seeds with a spicy-sweet peanut curry)


Another favorite from the apawas (fasting) menu. My aji's patent recipe! The good thing about this dish is its one of the healthier 'fasting' dishes. I satisfy my hunger for sabudanyachi khichadi with this :P Samo seeds (varaiche tandul) are healthy and the curry has yogurt and peanuts! not bad, eh?!

You will need: (serves 2)

for the rice:
samo seeds, washed 1/2 cup
hot water 1.5 cups
1/2 tsp ghee
salt

For the aamti (curry):
1/2 cup peanut powder (roasted and crushed, without skin)
yogurt 1/2 (mixed with a cup of water) cup OR buttermilk 1 cup
1 tsp ghee/ oil
2 green chillies, slit lengthwise
cumin seeds
2-3 dried amsul (dried garcinia indica/ kokum) or tamarind
salt, sugar

1. in a large saucepan, sauté the samo seeds on ghee and add hot water and salt.
2. Cover and cook for 5-10 minutes on low flame, check every once in a while


3. In another pan, heat the ghee and add cumin seeds and green chillies.
4. To this add the amsul (If using tamarind instead of amsul, add it later)
5. add peanut powder to this and fry for a minute, till the peanut powder takes a nice golden hue and gives off the perfect aroma!
6. Once this happens, add the yogurt-water mixture
7. Add more water as required, the peanut powder will thicken the curry as it boils.
8. Add samt and sugar according to taste (this is supped to be sweet and spicy!) (If adding tamarind, add iot at this point)
9. Let the curry boil thoroughly
10. Garnish with fresh chopped cilantro


Kande Pohe

(Flattened rice breakfast snack)


"Seriously you are writing a blog post on 'kande pohe'??" my mom asked me :P But trust me its the simple common things that need to be perfect, because you have to eat those a lot!!

This is probably the most common breakfast dish in western India. Its the dish that a girl makes for her prospective groom, when he come to 'see' her for the first time in traditional indian arranged marriages! Whenever I made good Kande Pohe my Panji (great grand mom) cried, thinking how lucky my husband would be :P Such is the power of perfectly made Kande pohe..  Obviously it has gotten a lot of attention in pop culture too! theres even a song about it!

So, if you want to impress prospective spouses (;P) or great grand moms or anyone for that matter! heres the perfect recipe..

You will need:


1 cup thick flattened rice (pohe), wash for a few seconds under running water, then strain on a sieve for at least 10 minutes. This is the most crucial part. the rice should be soft and completely hydrated but not mushy and watery.
1 small onion, chopped square, medium cut
1 small potato (optional) thick small slices
4-5 curry leaves
2 green chillies, small pieces
a small piece of ginger
mustard
1 tbsp oil
turmeric
asafetida (hing) (a lil more than usual)
salt
sugar
fresh chopped cilantro
lime


1. Add salt, sugar, lime juice and turmeric over the drained flattened rice (pohe)
2. Heat oil in a pan, add mustardand hing to hot oil, after the mustard crackles, add chillies and curry leaves
3. Add the chooped onion and potato, and let it cook, covered for a few minutes.
4. Once the potatoes and onions are cooked, add the seasoned flattened rice.
5. Mix, the turmeric will mix with the oil and goive a nice color.
6. add a dash of finely grated fresh ginger (optional)
7. Cover and let cook for just about a minute.
8. Remove lid and add finely chopped fresh cilantro


Kairicha Panha

(cardamon and saffron flavored raw-mango drink)


Theres many ways this drink is made with jaggery, sometimes with uncooked raw mangoes, etc. One of my friend's mom made this awwessommmee version with raw uncooked mango, but sigh, me or noone else I know can manage to make it taste the same as hers.., so this one gotta be my favorite kind! The recipe is a modified version of Aruna kaku's recipe(my sweet neighbor). The perfect refreshing welcome drink for  summer :)

Its the easiest thing to make on the earth, but trust me it wont go unappreciated! in fact people will treat it like you made the most complicated thing ever :P


straight to the recipe:

You will need:

2 raw mangoes
Pressure cooker
2 cups sugar (fine/powdered)
1/2 tsp salt
1/2 tsp cardamon powder
saffron few strands,slightly toasted and crushed (this way the flavor is stronger)

ya.. thats it!


1. Place the raw mangoes in a pressure pan/cooker, put water till the mangoes are half submerged
2. cook under pressure (3-4 whistles)
3. Wait till they cool down, then peel
4. Remove the pulp, and measure it (you will get about 1 cup from 2 large mangoes)
5. add double the amount of powdered sugar (e.g. 2 cups sugar for 1 cup of raw rmango pulp)
6. You may have to add more or less sugar (sometimes upto 4 times!! ) depending on how sour the raw mangoes are.
7. add the salt, cardamon powder and saffron.
8. Fill in an air tight jar and keep overnight.
9. It should be like a sweet jam the next day, if not, adjust the amount of sugar. (In fact, this can be used as a kairi jam too, tastes like moramba!)
10. To prepare the drink- mix a big spoonful of this mix add water and ice and enjoy!!!

How about adding a dash of tequila and making Panha Margarita???!! Maybe save a little pulp+sugar mixture without the saffron and cardamon, and make raw mango margaritas! Dont forget the salt on the rim ;) 

Monday, March 18, 2013

Kacchi Dabeli

Another Indian street food specialty! A sandwich with spicy-sweet potato filling and other things!


 I am sure everyone has had at least one person in their life, at some point, who, no mater how hard you try to impress, wont appreciate your effort. They irritate the hell out of you, I know. But theres one good thing about them :) Maybe they are just being honest! and when they THEY of all people give you a compliment, you know you were awesome! Well one such person, said "this is one of the best things I have ever eaten", with a mouthful of kacchi dabeli that I made :) SCORE

So if this Kachhi Dabeli isnt perfect enough for you, I dont know what is!

So, heres the recipe, I devised by my own genius :) And this recipe takes me straight to that rainy day in my old house, where we got home Kacchi Dabelis, wrapped in scrap newspaper, tied with thread, that had a hint of kerosene smell :P

Before we start, theres several components in a kacchi Dabeli. So I will break it up and explain, how you prepare each!

1. Pav: Buy Indian Pav (tastes ok with sandwich bread, but Pav is preferred).. I am still experimenting with Pav-making and havent gotten there yet :/

2. Green chutney: grind together, to a thin spreadable paste:
1 clove of garlic
3 small pieces of ginger
1-2 green chillies
a bunch of coriander leaves (cilantro)
a bunch of mint leaves
salt and water (as needed)

3. Tamarind chutney: Well this one is difficult to make, or too much work for small scale. So you can buy any sweet tamarind/tamarind-date chutney. I prefer 'joy' or 'deep' brands in the US. If you are enthusiastic enough to make it from scratch, heres my Mom's Tamarind Chutney Recipe

4. Spicy peanuts: A Kacchi Dabeli has to have these! Make these before hand, for them to be exactly like the ones you get on carts in India.
Mix together (no heat, cold mix):
1/2 cup of roasted, salted skinless peanuts
1 tsp oil
1 tsp kashmiri chillli powder
1/2 tsp chaat masala
salt as needed


5. Sev: Well this you just buy thin sev :P  I suggest 'Mirch Masala' brand. Their Sev is really good, like Indian sev.

6. Onion and cilantro: chopped fine!


7. Bhaji: (stuffing): Most important part! For this you will need:
2 large potatoes, boiled and peeled.
2 tbsp oil
2 tbsp Tamarind chutney
1 tsp garam masala
1/4 tsp clove powder
1/4 tsp cinnamon powder
1/4 tsp goda masala (maharashtrian masala, omit this if you cant get hold of it)
1/4 tsp coriander-cumin powder
1 tsp kashmiri chilli powder
pinch of hing
pinch of turmeric
Pomegranate (I dint have that yesterday)


Mash the potatoes, like theres no tomorrow. You should end up with a smooth soft mashed potato.
Heat the oil in a pan, add tamarind chutney, lower the flame.
Add all the spices and powders, let simmer in oil for a while.
Add the potato in the pan and mix everything
Add salt and sugar to taste (this bhaji has to be super spicy and sweet, plus it goes inside bland bread, so add enough salt)
Remove from heat, when mixture is homogenous and let it cool
Once cooled, add Pomegranate on top!

Assembling the Kacchi Dabeli:


Cut open the pav at an angle (so that two sides are still attached)
Apply both the chutneys to each side
Add in a layer of the bhaji (stuffing)
Add the onion, cilantro, peanuts and sev
Close the dabeli, and roast it on a hot griddle with Amul butter on both sides!

Serve hot!


Tamarind Chutney

A tangy sweet chutney used for Indian chat dishes

My Mom's recipe :) You can make this in bulk and it will stay good in the refrigerator for over a year. Its like tamarind jam! When you need it, just take a little at a time and mix with water for desired consistency.

You will need:
1 cup tamarind (cleaned)
1/2 cup minced jaggery
1/2 cup (heaped) sugar
water

Take tamarind and water, start boiling. Boil until all the tamarind is mushy and soft.
Cool this mixture and strain. force it through with a spoon. you will end up with tamarind pulp.
in a separate pan, take the sugar, jaggery and about 1/4 -1/2 cup of water. Start heating.
When this mixture dissolves and forms a syrup, add the tamarind pulp.
Boil this mixture for 10 minutes.
When cooled, it should become a thick pulp.
Store in an air tight jar in the fridge.

Perfect tamarind chutney ready in the fridge, just when you need it :)


Sunday, February 24, 2013

Khekda Bhaji

Crispy Onion Fritters

When life gives you bad weather, make khekda bhaji!!! Thats what I do. If you want to make the most of having to stay at home because of rain or snow, you better make these and I bet you will thank the weather Gods (and me!)

Now theres this kind of onion bhaji that people make and I absolutely hate. They are bulgy, soft and soggy. If I have to eat fried food, it better be perfect. So heres a perfect recipe for you! I assure you it will be crispy and just perfect.. (PS: Sorry, no time to take better pictures, they just disappeared right from this very bounty-lined plate :/ )


You will need:

2 Thinly sliced red onions (separate the flakes, after cutting)
Oil for frying
chickpea flour
1 heaped Tbsp Rice flour
salt
chilli powder
asafetida (hing)
turmeric
cilantro
a pinch of Baking soda (NOT baking powder)
finely chopped green chillies (optional)

1. cut the onions
2. Start heating the oil in a pan
3. add salt, chilli powder, turmeric, hing, green chillies and cilantro in the onions and mix.
4. In about two minutes the mixture will get a little moist.


5. Add baking soda and rice flour and mix
6. Start adding chickpea flour, 1 spoon at a time and keep mixing.
7. about 4-5 tbsp of chickpea flour should fit in.


8. The final mixture should not be too dry or too wet. (I hope the pictures explain the final required consistency)
9. DO NOT ADD WATER
10. By this time, the oil should be hot. add 2 spoons of this hot oil into the bhaji mixture and mix.
11. You are all set to fry!
12. Drop chunks of the mixture into hot oil and fry on medium heat till dark golden brown


13. Transfer on kitchen towel and sprinkle with chaat masala when hot (optional)
awesomeness!

Tilachi Barfi

 (sesame and peanut fudge)

If you are not the person who likes to bite into til-gul brittles, this one is for you! My aji's innovation :) This is not like any other tilgul you have eaten! It has vanilla for flavoring, but you wont even know it has vanilla, what the vanilla does is takes the tilachi barfi to a different level! such a modern twist on tilgul. I made it for this sankranti. Havent since, gotten time to put together this post. Anyway, its never too late. At least this way you will have it in time before next snkranti :P

This is the kind of recipe I will usually stay away from. It involves sugar-syrup making (which freaks me out). But for this particular preparation, I stood right by my aji's side and observed each step and learnt how to make the perfect consistency sugar syrup for this application!

Ill walk you through the steps with pictures, hope it makes sense to you..


You will need:

1 cup powdered sesame seeds (roasted, then ground)
1 cup powdered peanuts (lightly roasted and ground)
3/4 cup sugar
whole milk
vanilla extract (seriously, trust me! also, if you can get hold of the 'viola' indian brand, it will be better)
1 tsp Ghee

1. take the sugar in a pan
2. pour milk until all the sugar is covered and some more
3. start heating this mixture on low flame, stirring constantly. This is how it will look, as the sugar dissolves and the milk starts to boil


4. To make sure you get the perfect consistency, after every 1-2 minutes, take a tiny dot of the syrup with a spoon onto a glass dish. The picture below shows the results you will get.


5. From left to right in the picture, you can see how the shape of the dot changes. Notice that the one on the far right is homogenous and 3D (if you know what you mean. It does not splutter on the plate, stays like a hemisphere!
6. Thats exactly how much you want to cook the syrup. At this very instant, add the peanut and sesame powders and mix vigorously.
7. The mixture will be liquidy at first, but will start getting dry immediately

8. You dont want to let it become too dry, while its still soft take it off the heat (this happens in a few seconds, be alert)
9. keep mixng while off the heat. When a little warm, add Ghee and 1/2 tsp of vanilla extract and mix
10. transfer onto a greased sheet, while still warm. Press flat and cut squares.
11. Let cool and remove. Enjoy!